Skip to content
WordPress powers over 40% of websites on the internet, making it a popular target for hackers and cyber attackers. By taking proper security measures, you can reduce the risk of a security breach and protect your website’s data and user information. Some of the steps outlined in the previous response are a good starting point, but it’s always a good idea to stay informed and stay up-to-date with the latest security best practices. WordPress is the most popular website builder on the market, with millions of sites powered by the platform. But with such widespread use, WordPress is a prime target for cyber criminals and hackers. To protect your site and your business, it’s essential to take the necessary steps to secure your WordPress website. In this article, we’ll cover the top ways to increase your WordPress security and keep your site safe from cyber threats.
WordPress security is important for the following reasons:
- Protects sensitive data: WordPress websites store important information such as user passwords, financial transactions, and personal details. A security breach can result in this sensitive data being compromised.
- Prevents site downtime: A hacked website can cause downtime, affecting user experience and causing loss of revenue for business websites.
- Protects brand reputation: A security breach can damage a website’s reputation, causing users to lose trust in the website and its brand.
- Meets legal requirements: Websites that handle sensitive user information (e.g. personal details, payment information) are often subject to compliance requirements such as GDPR, which require appropriate security measures to be in place.
- Prevents malware spread: A hacked website can be used to spread malware to other websites and users, causing further harm to the wider internet community.
By taking appropriate security measures, website owners can protect their websites, their users, and their online reputation.
Keeping WordPress Updated
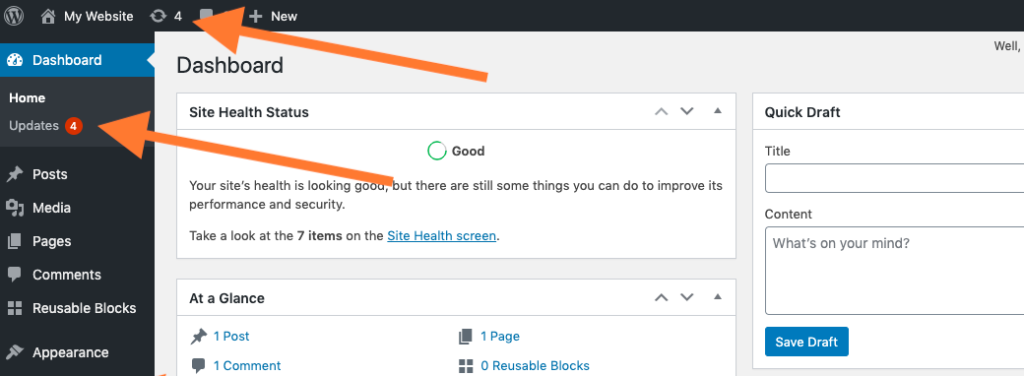
Keeping WordPress and its plugins up-to-date is an important aspect of WordPress security. Updates often include security patches that fix known vulnerabilities in the software.
Here’s how to keep WordPress updated:
- Enable automatic updates: WordPress can be configured to automatically update itself and its plugins. This can be done through the WordPress dashboard or by adding code to the wp-config.php file.
- Manually update WordPress: If automatic updates are not enabled, updates can be performed manually from the WordPress dashboard.
- Update plugins: Regularly check for updates for all installed plugins and update them as needed.
- Backup before updating: It’s always a good idea to backup your website before performing any updates, in case something goes wrong during the update process.
By keeping WordPress and its plugins up-to-date, website owners can ensure that their website is running the most secure version of the software, reducing the risk of security breaches.
Strong Passwords and User Permissions
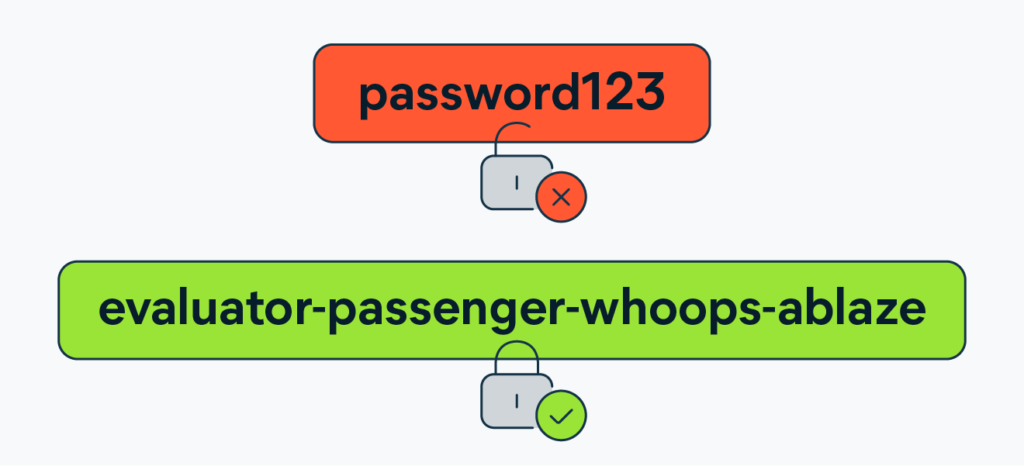
Using strong passwords and limiting user permissions are two important aspects of WordPress security.
- Strong Passwords: Encourage users to use strong, unique passwords that are difficult to guess or crack. A password manager can help users generate and store strong passwords.
- User Permissions: Limit the permissions of users on a need-to-know basis. For example, limit the permissions of subscribers to just reading content, and limit the permissions of authors to just creating and publishing content. Avoid granting administrative permissions to users who do not need them.
By implementing strong passwords and limiting user permissions, website owners can reduce the risk of unauthorized access to sensitive information and the risk of security breaches caused by user error.
The Role of WordPress Hosting
The hosting environment plays a crucial role in the security of a WordPress website. A secure hosting environment can help protect a website from potential security threats and prevent unauthorized access to sensitive information. Here are some ways in which hosting can impact the security of a WordPress website:
- Server Security: A secure hosting environment should have appropriate measures in place to protect the server from potential security threats, such as malware, DDoS attacks, and unauthorized access.
- Software Updates: The hosting provider should keep the server software (e.g. PHP, MySQL) up-to-date with the latest security patches.
- Backups: A reliable hosting provider should provide regular backups of the website, allowing website owners to quickly restore their website in the event of a security breach or other disaster.
- Support: A good hosting provider should offer support and guidance on security-related issues and help website owners resolve any security-related problems.
By choosing a secure and reliable hosting provider, website owners can reduce the risk of security breaches and ensure that their website is well-protected against potential security threats.
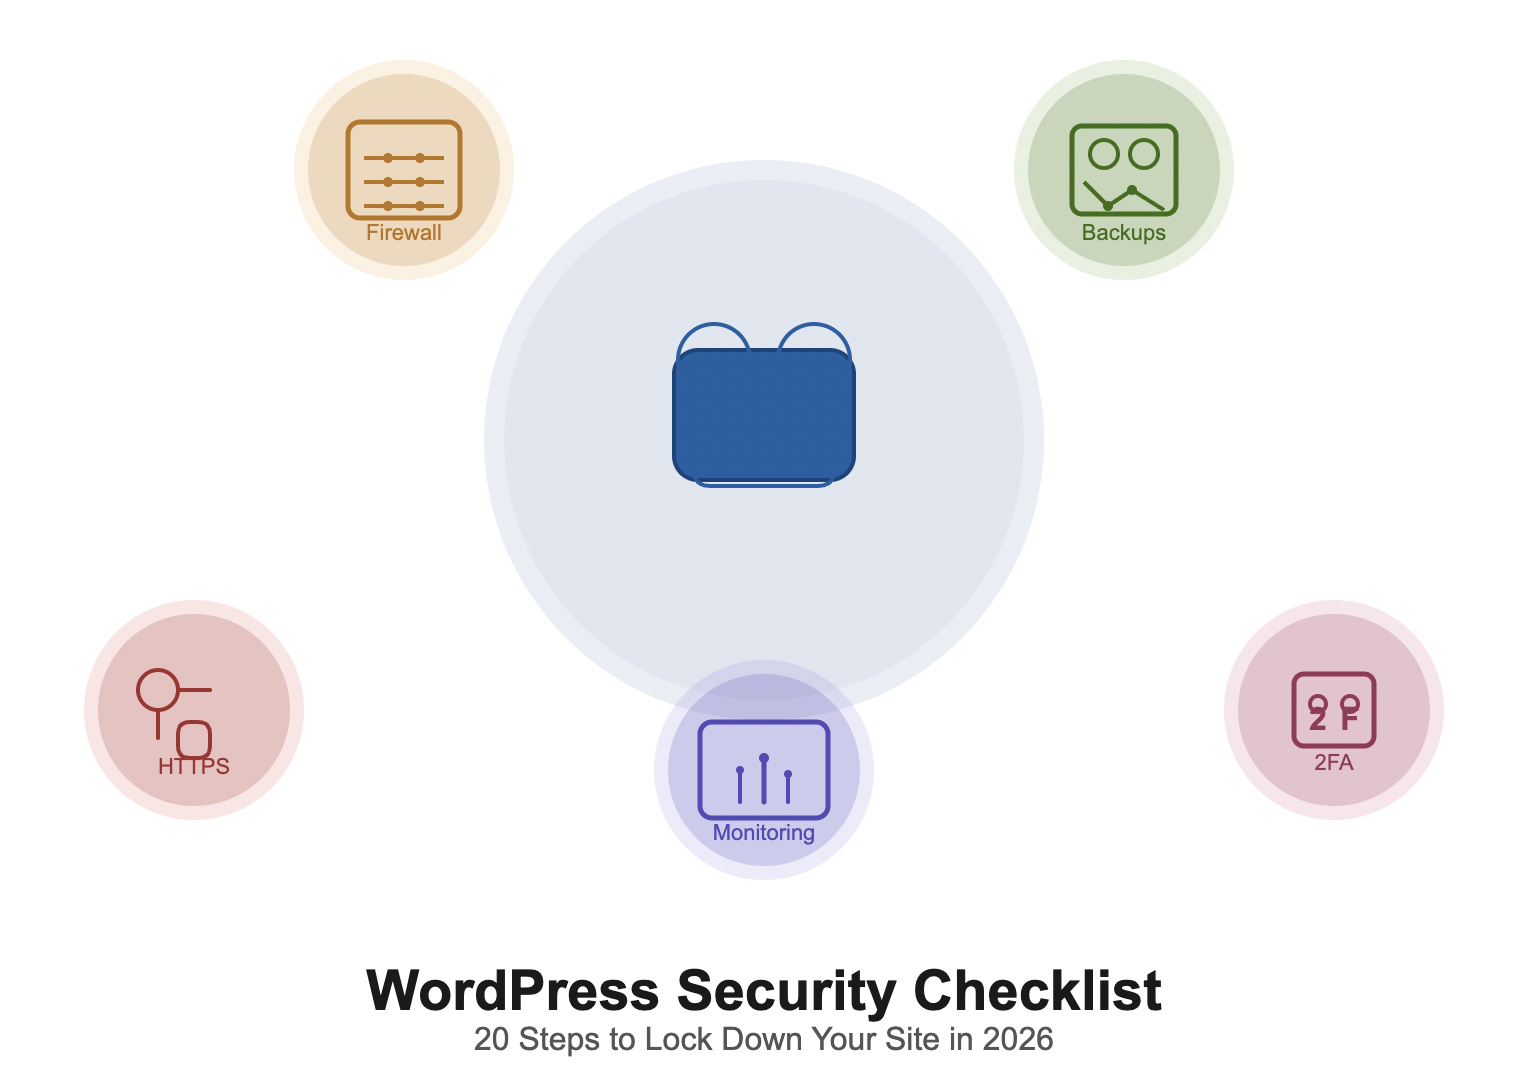
WordPress Security in Easy Steps
Here are some easy steps to improve the security of a WordPress website:
- Keep WordPress and plugins up-to-date.
- Use strong passwords and 2-factor authentication.
- Limit login attempts.
- Use a security plugin, such as Wordfence or iThemes Security.
- Regularly back up your website.
- Use HTTPS (SSL) to encrypt data in transit.
- Keep the hosting environment secure.
- Monitor the website for suspicious activity.
- Limit file permissions.
- Regularly scan the website for malware.
By following these steps, website owners can improve the security of their WordPress website and reduce the risk of security breaches. It’s important to keep in mind that security is an ongoing process and that website owners should stay informed about the latest security best practices and regularly assess the security of their website.
WordPress Backup Solution
Backing up a WordPress website is an important aspect of website security and helps protect against data loss in the event of a security breach or other disaster. Here are some options for backing up a WordPress website:
- Manual backups: Website owners can manually create backups of their website by copying the website files and database to a safe location.
- Plugins: There are several plugins available for WordPress that can automate the backup process, such as UpdraftPlus and BackupBuddy.
- Hosting providers: Some hosting providers offer automatic backups as part of their hosting service.
- Cloud services: Website owners can also use cloud services such as Google Drive, Dropbox, or Amazon S3 to store backups.
Regardless of the backup solution used, it’s important to regularly test the backups to ensure that they can be easily restored in the event of a disaster. Website owners should also store backups in a secure location and consider using encryption to protect sensitive data.
Best WordPress Security Plugin
There are many security plugins available for WordPress, but some of the best include:
- Wordfence Security: A comprehensive security plugin that includes features such as firewall protection, malware scanning, and two-factor authentication.
- iThemes Security: A popular security plugin that includes features such as password security, two-factor authentication, and brute force protection.
- Sucuri Security: A cloud-based security plugin that includes features such as malware scanning, firewall protection, and website hardening.
- All In One WP Security & Firewall: A comprehensive security plugin that includes features such as password security, user account security, and firewall protection.
These plugins can help website owners improve the security of their WordPress website and protect against potential security threats. When selecting a security plugin, it’s important to consider the specific security needs of the website and to choose a plugin that provides the features required to meet those needs.
Mast enable WordPress Firewall system
A Web Application Firewall (WAF) is a security system that sits between a website and the internet, monitoring incoming traffic and blocking malicious traffic before it reaches the website. WAFs can help protect a website against common security threats such as SQL injection, cross-site scripting (XSS), and distributed denial of service (DDoS) attacks.
There are several ways to enable a WAF for a WordPress website:
- Hosting providers: Some hosting providers offer WAF protection as part of their hosting service. Website owners should check with their hosting provider to see if this is an option.
- Security plugins: Many security plugins for WordPress, such as Wordfence and iThemes Security, include WAF functionality.
- Standalone WAF services: Website owners can also choose to use a standalone WAF service, such as Cloudflare or Sucuri, which can be integrated into the website.
Regardless of the method used, it’s important to properly configure the WAF to ensure that it is providing the necessary level of protection for the website. Website owners should also regularly monitor the WAF logs to identify and address any security incidents.
Convert WordPress Site to SSL/HTTPS
Moving a WordPress website to SSL/HTTPS can help secure the data transmitted between the website and its users, protecting sensitive information such as passwords and credit card numbers from being intercepted. Here are the steps to move a WordPress website to SSL/HTTPS:
- Obtain an SSL certificate: An SSL certificate can be obtained from a trusted certificate authority, such as Comodo or GlobalSign.
- Install the SSL certificate on the server: The SSL certificate must be installed on the server that hosts the website. This can usually be done through the hosting control panel or by contacting the hosting support team.
- Update the website URL: The website URL must be updated in the WordPress settings to use HTTPS. This can be done in the WordPress General Settings.
- Update links and resources: All internal links and resources (such as images, videos, and scripts) must be updated to use HTTPS. This can be done using a plugin such as Really Simple SSL.
- Test the website: After the SSL certificate is installed and the website URL and resources have been updated, it’s important to test the website to ensure that everything is working as expected.
By following these steps, website owners can move their WordPress website to SSL/HTTPS, improving the security of the website and protecting sensitive information transmitted between the website and its users.
You should change defult admin user
Using the default “admin” username for a WordPress website can make it easier for attackers to guess the username and gain access to the website. Here are the steps to change the default “admin” username in WordPress:
- Create a new user: In the WordPress Dashboard, navigate to Users > Add New and create a new user with administrator privileges.
- Log in as the new user: Log out of the current user account and log back in as the new user.
- Delete the old “admin” user: Navigate to Users > All Users and delete the old “admin” user.
- Assign the old “admin” user’s content to the new user: When prompted during the deletion process, select the new user to be the new owner of the old “admin” user’s content.
By following these steps, website owners can change the default “admin” username in WordPress, making it more difficult for attackers to guess the username and gain access to the website. It’s important to use a strong, unique username and password for all user accounts on a WordPress website to improve the overall security of the website.
Disable File Editing
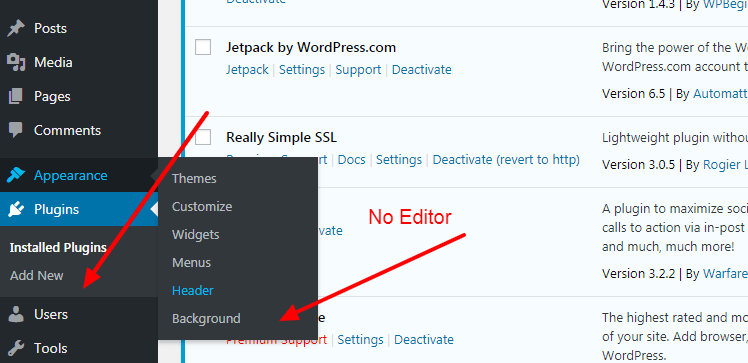
By default, WordPress allows users with administrative privileges to edit theme and plugin files directly from the WordPress Dashboard. This can be a security risk as an attacker who gains access to the website could make changes to the website’s code, potentially compromising the website.
To disable file editing in WordPress, add the following code to the wp-config.php file:
( 'DISALLOW_FILE_EDIT', true );
This code will prevent anyone with administrative privileges from accessing the theme and plugin editor in the WordPress Dashboard. If changes need to be made to the website’s code, they should be done on a development server and then deployed to the live website.
By disabling file editing in WordPress, website owners can reduce the risk of attackers compromising the website by making changes to the website’s code.
Disable PHP File Execution in WordPress Directories
n WordPress, some directories such as the uploads directory are used to store files that are accessible from the website. By default, these directories can also contain PHP files that can be executed, potentially compromising the website.
To disable PHP file execution in certain WordPress directories, website owners can add the following code to a .htaccess file in the directory:
<Files *.php>
  deny from all
</Files>
This code will prevent PHP files from being executed in the directory, reducing the risk of an attacker compromising the website by executing malicious PHP code. It’s important to only disable PHP file execution in directories that don’t need to execute PHP code, as doing so can break the functionality of the website.
By disabling PHP file execution in certain WordPress directories, website owners can improve the security of the website and reduce the risk of an attacker compromising the website.
Limit Login Attempts
Brute-force attacks on WordPress websites are common, where attackers try to guess the username and password to gain access to the website. To reduce the risk of a brute-force attack succeeding, website owners can limit the number of login attempts for each user account.
There are several WordPress plugins available that can limit login attempts, such as Limit Login Attempts and iThemes Security. These plugins allow website owners to set the maximum number of login attempts before the user account is locked out for a set period of time.
Here’s an example of how to limit login attempts using the Limit Login Attempts plugin:
- Install the plugin: In the WordPress Dashboard, navigate to Plugins > Add New and search for Limit Login Attempts. Install and activate the plugin.
- Configure the plugin: Navigate to Settings > Limit Login Attempts to configure the plugin.
- Set the maximum number of login attempts: Set the maximum number of login attempts before the user account is locked out.
- Set the lock-out period: Set the length of time that the user account will be locked out after reaching the maximum number of login attempts.
By limiting the number of login attempts for each user account, website owners can reduce the risk of a brute-force attack succeeding. It’s important to use strong, unique usernames and passwords for all user accounts on a WordPress website to further improve the overall security of the website.
Two-factor authentication (2FA)
Two-factor authentication (2FA) adds an extra layer of security to the login process by requiring users to provide two forms of authentication. In addition to a username and password, users are also required to enter a one-time code generated by a mobile app or sent to their phone.
There are several WordPress plugins available that support 2FA, such as Google Authenticator and Authy. These plugins allow website owners to require 2FA for all user accounts or only for specific user roles.
Here’s an example of how to enable 2FA for all user accounts using the Google Authenticator plugin:
- Install the plugin: In the WordPress Dashboard, navigate to Plugins > Add New and search for Google Authenticator. Install and activate the plugin.
- Configure the plugin: Navigate to Users > Your Profile to configure the plugin for your user account.
- Install the Google Authenticator app: Download and install the Google Authenticator app on your smartphone.
- Set up 2FA: In the WordPress Dashboard, scan the QR code with the Google Authenticator app to set up 2FA for your user account.
- Enter the one-time code: Each time you log in to the WordPress Dashboard, you’ll be prompted to enter a one-time code generated by the Google Authenticator app.
By enabling 2FA for all user accounts, website owners can add an extra layer of security to the login process and reduce the risk of an attacker gaining access to the website. It’s important to also use strong, unique usernames and passwords for all user accounts on a WordPress website to further improve the overall security of the website.
WordPress Database Prefix
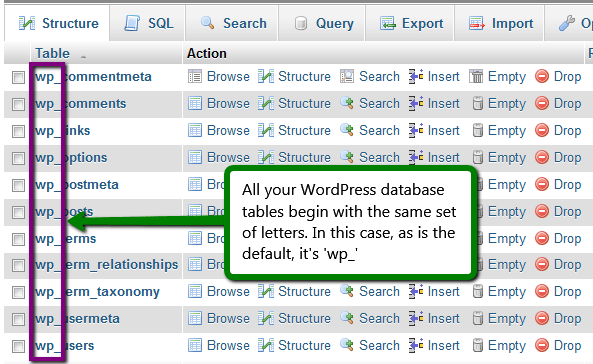
The database prefix is the string of characters that prefixes the table names in the WordPress database. By default, WordPress uses “wp_” as the database prefix. Attackers can use this information to target specific tables in the database, so it’s recommended to change the database prefix to something more secure.
Here’s an example of how to change the database prefix in WordPress:
- Backup your website: Before making any changes to the database, it’s important to backup your website.
- Access the database: You can access the database using a tool such as phpMyAdmin, which is often provided by your web host.
- Change the prefix: In the database, locate the wp_options table and change the prefix to something unique, such as “wpx_”.
- Update the wp-config.php file: In the WordPress installation directory, locate the wp-config.php file and update the following line of code with the new database prefix:
$table_prefix = 'wpx_';
- Replace all instances of the old prefix in the database: Use a tool such as the Better Search Replace plugin to replace all instances of the old prefix with the new prefix in the database.
- Test the website: After making these changes, test the website to make sure everything is working correctly.
By changing the database prefix, website owners can reduce the risk of an attacker gaining access to the WordPress database. It’s important to always backup your website before making any changes to the database.
Password Protect Login Page
Password protecting the WordPress admin and login page adds an extra layer of security to the website by requiring users to enter a password before accessing the WordPress Dashboard or the login page.
Here’s an example of how to password protect the WordPress admin and login page using the .htaccess file:
- Access the .htaccess file: The .htaccess file is located in the root directory of the WordPress installation. You can access the file using an FTP client or the File Manager in cPanel.
- Add the following code to the .htaccess file:
<FilesMatch "wp-login.php">
AuthType Basic
AuthName "Restricted Area"
AuthUserFile /full/path/to/.htpasswd
Require valid-user
</FilesMatch>
- Create the .htpasswd file: The .htpasswd file contains the username and password for the user who will be able to access the WordPress Dashboard and login page.
- Add the following code to the .htpasswd file:
username:encryptedpassword - Update the paths in the .htaccess file: Update the path to the .htpasswd file in the .htaccess file to match the location of the file on your server.
- Test the website: After making these changes, test the website to make sure everything is working correctly.
By password protecting the WordPress admin and login page, website owners can reduce the risk of an attacker gaining access to the WordPress Dashboard or login page. It’s important to use a strong, unique password for the user who will be able to access the WordPress Dashboard and login page.
Disable Directory Indexing
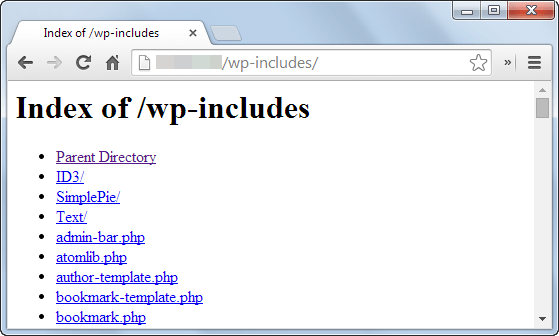
Directory indexing and browsing allows users to see a list of files and directories in a directory if there is no index file (e.g. index.html) present. This can provide attackers with information about the structure of the website, which can be used to plan an attack.
To disable directory indexing and browsing in WordPress, you can add the following code to the .htaccess file in the root directory of the website:
Options -Indexes
This code will prevent users from seeing a list of files and directories in the website if there is no index file present.
It’s important to keep in mind that disabling directory indexing and browsing can also prevent users from accessing content that you want them to access. Before making any changes to the .htaccess file, it’s recommended to backup the website to ensure that you can revert the changes if necessary.
Disable XML-RPC Port in WordPress
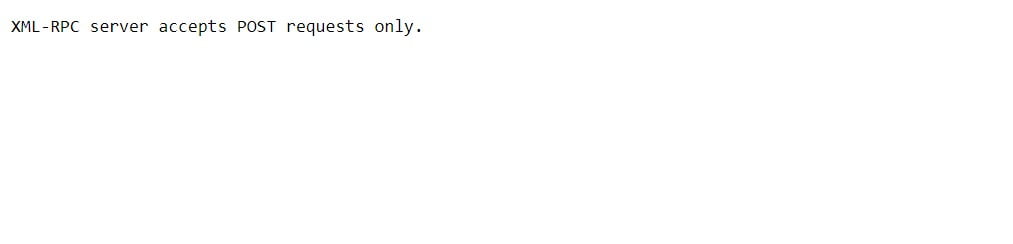
XML-RPC is a feature in WordPress that allows remote posting and other features to be performed through XML-RPC APIs. While XML-RPC is useful for certain applications, it can also be a security risk, as it can be used to perform brute force attacks, DDoS attacks, and other types of attacks.
To disable XML-RPC in WordPress, you can add the following code to the functions.php file in your WordPress theme:
add_filter('xmlrpc_enabled', '__return_false');
Alternatively, you can install a plugin that disables XML-RPC, such as the Disable XML-RPC plugin.
By disabling XML-RPC in WordPress, you can reduce the attack surface of the website and prevent attackers from exploiting vulnerabilities in XML-RPC to gain unauthorized access to the website. However, it’s important to note that disabling XML-RPC can also break certain features of your website that rely on XML-RPC, so it’s recommended to test the website after making this change to ensure that everything is working as expected.
Scanning WordPress for Malware and Vulnerabilies
Regular scanning of a WordPress website for malware and vulnerabilities is an important part of maintaining the security of the website. There are several tools available for scanning WordPress websites for security issues, including:
- Wordfence Security: A comprehensive security plugin for WordPress that includes malware scanning, firewall, and security alerts.
- Sucuri Security: A website security platform that provides malware scanning, website firewall, and security monitoring.
- iThemes Security: A security plugin for WordPress that includes malware scanning, two-factor authentication, and other security features.
- Anti-Malware Security and Brute-Force Firewall: A security plugin for WordPress that provides malware scanning and protection against brute force attacks.
- Google Safe Browsing: A service provided by Google that checks websites for malicious content and displays warnings to users if a website is compromised.
By regularly scanning your WordPress website for malware and vulnerabilities, you can detect and resolve security issues before they can be exploited by attackers. It’s recommended to scan your website at least once a month and to take prompt action to resolve any security issues that are identified.
Frequently Asked Questions About WordPress Security
A: It’s recommended to update your WordPress and plugins as soon as a new version becomes available, as updates often include security fixes.
A: If your website gets hacked, it can result in data theft, loss of traffic and revenue, and damage to your reputation. It’s important to act quickly to clean up the hack and secure your site to prevent further damage.
While free security plugins can provide basic protection, it’s recommended to use a paid security plugin for maximum protection and to receive professional support if needed.
Conclusion:
WordPress security is essential for protecting your website and your business from cyber threats. By following the tips and techniques outlined in this article, you can increase your WordPress security and keep your site safe. Don’t let a hack ruin your online presence; take the necessary steps to secure your WordPress website today.
If you want to add wordpress security to prevent future hacking/malware attqack, you can order from here. also you will get 1 year free security support.